
What is Multi-Factor Authentication (MFA) and its utility in Moodle
What is multi-factor authentication (MFA)?
Multi-factor authentication (MFA) is a security measure that requires users to verify their identity using two or more authentication factors. Factors can be something users know, such as a password, something they have, such as a phone or a security token, or something they are, such as a fingerprint.
MFA helps improve the security of your Moodle site because it is more difficult for attackers to overcome several «barriers» (each of the factors) than just one. Let's look at an example:
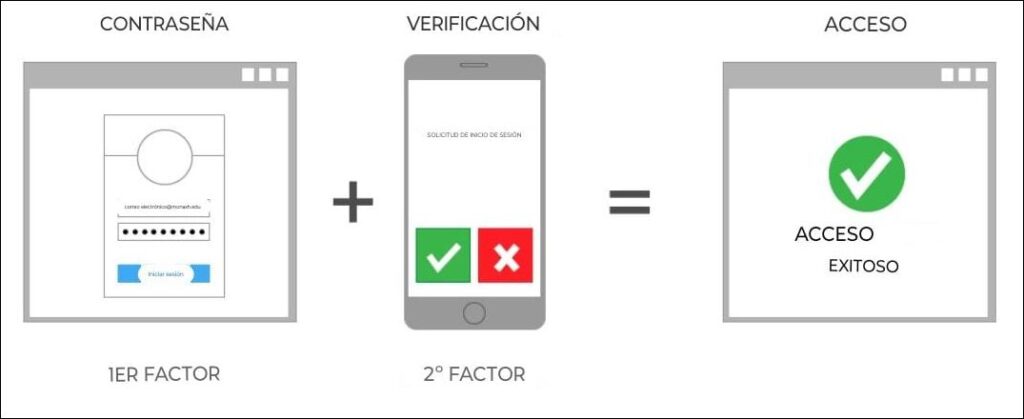
- Our Moodle asks the user for their username and password (1st factor)
- An authentication app on the user's mobile phone asks if it is really them who has requested the login. If they confirm, access is granted; if not, it is denied.
What is the use of multifactor authentication in our Moodle virtual campus?
To increase security:
If someone steals the credentials (username and password) of one of our teachers, or of a student, or ours as Administrator, they will not be able to enter, because they may overcome the first factor (the first barrier) but not the second. As in our log, the intrusion attempt will be recorded, so we can then change the password and the security of our campus will not have been compromised at any time.
To hinder fraud:
If we have a training academy for competitive exams, and a group of thrifty competitors try, for example, to share a single account for all of them, multifactor authentication will make it quite more difficult and cumbersome for them.

And won't all this be very cumbersome for my users?
Short answer: NO
Developed answer: multifactor operation in Moodle has been refined to, on the one hand, adapt to the characteristics and needs of the educational entity, and on the other, produce the least possible inconvenience for users.
If you are interested in implementing MFA in your campus, you can do it yourself, but if you lack time or motivation, we can do it for you, quickly and at an incredibly low cost. Call us at (+34) 681 264 155 or use our contact form.
It comes in handy at this moment. Let's talk a bit more about the factors. To understand each other, we could say that the factors of the multifactor authentication are ways of identifying oneself, and there can be many, for example:
- Typing a username and password is a factor.
- Typing a token (a 6-digit number, or a similar word) that has reached our mobile phone is a factor
- Placing our finger on a fingerprint reader is a factor.
- Connecting from a specific device (computer, tablet or mobile) that has a specific IP is a factor.
- Validating our connection from a mobile app, as is done with web access to many banks, for example, is a factor.
Now imagine the following example: a student connects to our Moodle campus and first identifies themselves with their username and password. As we have multifactor authentication activated, next our Moodle sends an email to their personal email address with a keyword that they will have to type to be given access. Once this procedure is passed, our system can store the IP address of the student's computer and the next time they connect, if they do so from that same computer, we will not ask for double authentication but only username and password. If, on the contrary, they connect from another device, with another IP address, to avoid possible fraud, then yes we will ask for double authentication. As you can see, by designing an appropriate multifactor operation (because we have seen that it does not have to always be the same, we can include the factors we want and in the order that suits us best) we can find the ideal compromise between sufficient security and minimising inconvenience to users.
Multifactor authentication management in Moodle
The latest versions of Moodle already include MFA, without the need to install any plugin. For previous versions, several plugins are available.
From Site Administration > Plugins > Administration Tools > Manage multifactor authentication, you can activate MFA by marking the MFA plugin checkbox as enabled.
If you are configuring MFA for your site for the first time, we recommend that you carefully consult the Recommendations and configuration examples that you will find later in this article.
Weights and factors
In Site Administration > Plugins > Administration Tools > Manage multifactor authentication, you can see a list of the available factors and select those you wish to compose MFA for your campus.
These factors have weight points, and users must reach 100 points to be able to log in. By configuring multiple factors and adjusting their weights, you can create complex and flexible rules for multifactor authentication.
For example, you can have two factors with 100 points each, if you want to give users different authentication methods, so that they can choose the one they prefer. Or you can have two factors with 50 points each, which means that users will have to go through both factors to be able to log in.
During the login process, factors that do not require user intervention, such as IP address or user role, are evaluated first. Next, the other factors are evaluated by weight order, starting with the highest, until the accumulated points reach the login threshold (100) or all factors have been checked and login is denied.
Available authentication factors
Standard authentication factors
These are common and well-known authentication factors used in many products and software programs:
Email: This factor requires users to enter a code received by email during the login process. When a user attempts to log in, the system generates a unique temporary code and sends it to the user's registered email address. The user must then enter this code along with their password to successfully complete the login process. This code has a limited validity period, which you can customise, to ensure it cannot be used for unauthorised access.
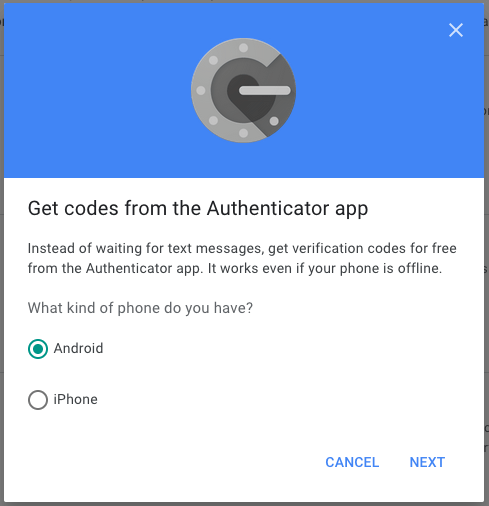
Authenticator app: This factor uses a mobile app to generate a temporary code for user authentication. During the login process, Moodle asks the user to enter a code generated by their authenticator app, in addition to their password. This code changes periodically, ensuring it cannot be reused for unauthorised access. Users must have an app installed on their mobile device and configure this factor themselves.
Security key: This factor uses physical hardware tokens, such as USB security keys or NFC, or physical biometrics such as fingerprints. During the login process, users must physically use their security key on their device to verify their identity. Users themselves must configure this factor.
IP range: This factor uses the user's IP address to verify their identity, providing greater security when accessing from a trusted network. It requires no prior configuration by users, which allows you to configure full login access on a trusted network. This factor requires no configuration by users.
User filtering factors
User filtering factors are a way to easily create user groups to whom the use of multifactor authentication (MFA) is required or not.
Non-administrator: This factor requires that only administrators have two or more authentication factors, without affecting other users. For this, it grants factor points to all users who are not administrators.
Authentication type: This factor allows certain users to skip additional authentication steps based on their authentication type. This can be useful for situations where certain types of authentication, such as SAML via ADFS, already provide a high level of security, making additional authentication checks unnecessary.
Moodle role: This factor must be used in combination with other factors, as it allows specifying which roles must use other factors to authenticate. For example, it allows you to require that people with high access privileges, such as managers and administrators, undergo a stricter authentication process, while other unspecified roles, such as students, can skip MFA.
Cohort: This factor must be used in combination with other factors, as it allows specifying which cohorts must use other factors to authenticate.
User capability: This factor is similar to the Role factor, and must also be combined with other factors, as it allows you to specify which users should use other factors to authenticate. To do so, check whether users have the capability 'factor/capability:cannotpassfactor' at the system level. Users who do not have the capability 'factor/capability:cannotpassfactor' will receive points for this factor and will be able to bypass MFA, whereas users with this capability will have to use a different type of authentication.
For example: You assign the capability 'factor/capability:cannotpassfactor' to all Managers, and you also activate the Email factor. When an administrator logs in, they will have to use the email factor. But when a student attempts to access, they will not be able to.
Since Administrator users have all capabilities allowed by default, including 'factor/capability:cannotpassfactor', there is an additional configuration that will allow Administrators to gain points for this factor despite having the capability.
Other factors
These factors provide additional flexibility and control over the authentication process.
Trust this device: This factor allows users to mark a device as trusted during MFA logins. Once a device is designated as trusted, users can skip MFA for a specified period of time when logging in from that device.
To implement this feature effectively, assign a score of 100 points to this factor.
Grace period: This factor is essential when you activate factors that require prior configuration by users, such as the authentication app or security key. It allows users to log in without using multi-factor authentication (MFA) for a determined period of time, which provides a period of time to complete the configuration of additional authentication factors. If a user is still within their grace period when reaching the first page after login, regardless of whether they used the grace mode as a login factor, a notification will inform them of the remaining duration of the grace period and the possible need to configure additional factors to avoid account lockout when the grace period expires.
To implement this feature effectively, assign a score of 100 points to this factor. To receive points for this factor, there must be no other factor that requires user interaction during the login process. Place this factor at the end of the list to ensure that all other factors are addressed first.
If the grace period ends and users have not configured their authentication methods, they will not be able to log in to their site. You can extend the grace period to allow them to log in, or enable other factors temporarily, such as IP range or role.
No other factor: This factor allows people to log in if they have not configured any other MFA factors. For example, if you want to offer MFA to your users but not make it mandatory, give 100 points to 'no other factors' to allow those who do not want to use MFA to log in to the site. Once another factor is configured for a user, they will no longer gain points for this one.
User configuration
If you enable the Authenticator app and Security Key as factors, your users will have to configure multi-factor authentication themselves. Access to authentication configuration can be reached via the User > Preferences > Multi-factor authentication preferences menu. There they can configure and view their authenticator apps or security keys, as well as revoke access to the factors they have configured.
Configuration recommendations and examples
When configuring MFA for your site, it is important to ensure that you are making your site more secure, but also creating a good experience for your users, including ensuring that they are able to log in if they follow the correct steps. These are some recommendations to ensure that MFA is affordable for your users:
- Ensure that you activate the grace period factor when you activate an authentication factor that requires users to configure something themselves (Authenticator app or security key). This will give your users time to configure MFA before they are required to use it.
- If you do not want MFA to be mandatory, activate No other factors. This will allow users without other factors to log in using only their password.
- The IP range factor is a very simple authentication method if all your users use the same network. Once users have logged in using this factor, you can allow them to configure additional factors, such as an authentication app, and then use those other factors to log in when they are not on your secure network.
Configuration examples
These are some examples of common MFA configurations to increase the security of your Moodle site.
a) Email verification
- Enable MFA.
- Activate the Email factor and give it 100 points.
- You can activate Trust this device to allow your users to skip MFA for a determined period of time after they have verified it with MFA for the first time.
- Inform your users that email verification is already enabled. The next time your users attempt to log in, they will see a message asking them to check their email and enter a code that has been sent there.
b) Authenticator app
- Enable MFA.
- Activate the Grace period factor and give it 100 points. This will give your users a period of time to configure their authentication apps and avoid being locked out of your site. Use the grace period warning banner to inform your users that MFA will be enabled shortly and encourage them to configure their authentication app.
- Activate the factor authenticator app and give it 100 points.
- You can activate Trust this device to allow your users to skip MFA for a determined period of time after they have verified it with MFA for the first time.
c) Email OR Authenticator app
- Activate MFA.
- Activate the Email factor and give it 100 points.
- Activate the Grace period factor and give it 100 points. This will give your users a period of time to configure their authentication apps and avoid being locked out of your site. Use the grace period warning banner to inform your users that MFA will be enabled shortly and encourage them to configure their authentication app.
- Activate the factor authenticator app and give it 100 points.
- You can activate Trust this device to allow your users to skip MFA for a determined period of time after they have verified it with MFA for the first time.
d) Email AND Authenticator app
- Activate MFA.
- Activate the Email factor and give it 50 points.
- Activate the Grace period factor and give it 100 points. This will give your users a period of time to configure their authentication apps and avoid being locked out of your site. Use the grace period warning banner to inform your users that MFA will be enabled shortly and encourage them to configure their authentication app.
- Activate the factor authenticator app and give it 50 points. Users will have to pass both factors to reach 100 points and be able to log in.
- You can activate Trust this device to allow your users to skip MFA for a determined period of time after they have verified it with MFA for the first time.
Summary of good access conditions
The selected factors and their total weighting are listed below, summing to 100.
General MFA configuration
- The MFA plugin enabled checkbox must be marked for MFA to function.
- From this section you can add any relative URL from the siteroot for which the MFA check will not redirect from
- Links to any guidance pages or files can be loaded here.
Blocked administrator without access to the site – how to resolve it
Be careful as an administrator when configuring and testing factors so that you do not lock yourself out of the site. If you do, you can disable MFA from the command line by entering:
php admin/cli/cfg.php –component=tool_mfa –name=enabled –set=0
